UPDATED Essential Monthly Planner

Can you believe it’s been FOUR years since I blogged about my monthly planner and how I keep all my bills and events organized in one place? I noticed recently that it’s getting a lot of hits on Pinterest and I thought I’d post about how I’m keeping my planner now.

dsc_0039

Currently, I’m using highlighters and small post-it notes to keep everything together. I’m not sure where to start, so I guess we’ll go from left to right.

dsc_0040

On the border on the top left I use pink post-its with blog post ideas that I may want to blog about that month.

dsc_0044

Then, once I blog about one of those ideas, I move the post-it to the day that I posted the blog, which isn’t necessary but is helpful in case you want to go back to previous months and look at what you’ve done.

dsc_0041

On the bottom left margin I use these pale yellow (or as I like to call them, smoker’s teeth yellow) post-its with things that I HAVE TO get done during the month. And yes, I moved to PA from NJ back in May and I still have not gone to the DMV to get my license plates transferred. I just REALLY hate the DMV! Anyways, once I get an oil change or get my license plates registered, I’ll move that post-it to the day that I did it.

dsc_0042

In my planner, I write when a bill is due. Since we moved, we’ve got a lot of credit card bills to pay off. So for example, I write down on the 4th that my Home Depot credit card bill is due, then under that I put what the balance is that I still owe. Then under that I write “New Balance” so on the 4th when I pay that bill, I write what the new balance is after making the payment. Then I take that new balance and put it on the next months post-it under “Still Owe”. This makes it easier to know where you’re at with each of your outstanding credit cards without having to look each one up online.

dsc_0046

As for our other bills, like the mortgage, car payments, electric, etc., I just write down on the day that I pay them and then cross them off. I also highlight it in green, or in my case I highlight it in yellow and blue because I don’t have a green highlighter – haha!

dsc_0045

I use these teal colored post-its for any kind of photo sessions I might have. I would just write that appointment in my planner but since moving to Easton, I have not required clients to pay a deposit to hold the appointment, so the appointment days change a lot. With the appointment being on a post-it, I can just move the post-it to any day they may change it to. It keeps my planner pretty so I don’t have to scratch out anything.

dsc_0017

I use the bright pink post-its for fun events like birthday parties, people coming into town, events in the community, etc.

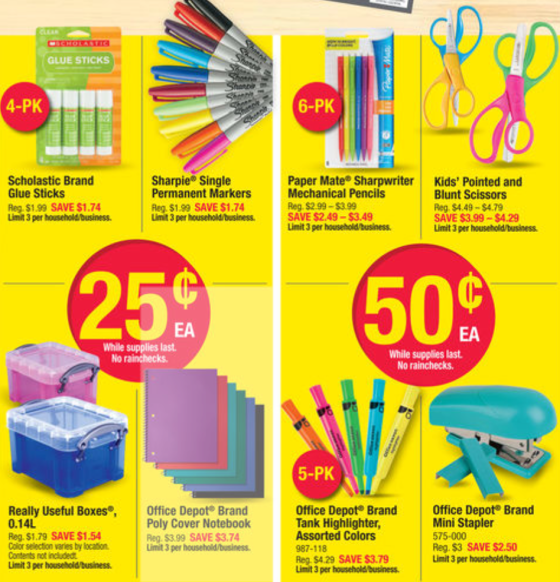
Btw, you can get these convenient post-its on Amazon and they’re super cheap. Pick them up here.

And that’s about it. I feel like my monthly planner has become a lot more efficient in the last four years and I hope it helps make your monthly planner more efficient as well!

img_2247

Affordable Front Porch Decor!

When we were house hunting we had to drive an hour and twenty minutes from the Jersey Shore area all the way to the Lehigh Valley each time we wanted to see a house. So we always made sure that we were seeing more than one house every time we made the trip. Most of the time, I’d find a house online that I wanted to see and then a few that I wouldn’t mind seeing or I’d just throw a random house on the list that I wasn’t interested in at all just to make it feel like I wasn’t traveling all that way for nothing if the house I liked ended up being a piece of shit. My agent Melissa Keck was tremendously amazing and put up with not only my random requests, like the house needs to have a window over the kitchen sink, but also Sam’s requests, like a room that can be dedicated as a video game room.

And I hate to say it, but the house we purchased was one of those filler houses. I put it on the list knowing I most likely wouldn’t like anything about it but wanted something to see before our appointment with the house I actually came to see.

This is the picture from the listing.

This is the picture from the listing.

The outside looked a little scary and uninviting and I ruled it out as soon as I pulled up, but once Melissa got there and we made our way inside, I fell in love! The absolute epitome of don’t-judge-a-book-by-it’s-cover.

The stairway and foyer, as soon as you step in the door, was exactly what I knew I wanted and that was it. We almost put an offer in before Sam even saw it in person, but it had been on the market for a little while and we felt good about waiting a week for Sam to get there to see it.

Anyways, I knew as soon as we moved in that I wanted to make the front porch more inviting. We also noticed that a lot of our neighbors would spend time on their front porches during the early evening. We live on a street that gets a decent amount of foot traffic and I’m nosy as hell and like to people watch so sitting out front is my favorite thing to do when the weather is nice.

Processed with VSCO with t1 preset

Our first purchase was obviously seating. I wanted something really simple and comfortable. And after spending a shit ton of money on our new house, I obviously was looking for something affordable. I found this set on Wayfair. And by the way, if you ever need anything for your home, Wayfair is without a doubt the way to go! They have great products and outstanding customer service.

The set is really cute and during the summer I had some bright yellow pillows that added a pop of color, but unfortunately, I left them out during a rain storm and they blew around and got messy. And I guess I’m the idiot, because they weren’t outdoor pillows. Oops.

The next thing we got, which are my favorite, are these galvanized metal buckets from a thrift antique store in downtown Easton for $15! I LOVE galvanized metal and Sam was not exactly sure why I was obsessing over them, but…. men, am I right? They just don’t get it! If you follow me on instagram, then you saw me post a picture of these a couple weeks ago and you already know how infatuated I am with them!

Btw, the welcome rug has been with us for about 6-7 years now! We got it to put outside our front door at our first apartment and we brought it with us to our first home and it’s still holding strong – haha!

That’s about it though. I think my entire life revolves around finding affordable pieces not only for my front porch but my entire home! I love recycling furniture and random pieces, like my buckets! I’m currently on the lookout for a vintage looking mailbox, so wish me luck!

img_2210

ALL the Back-to-School Deals in ONE PLACE!

This isn’t my first blog about the best place to buy school supplies, and I’m sure it won’t be the last! But we’re smack dab in the middle of all of these amazing back-to-school deals and I’ve gone through the top store’s weekly ads and found you ALL the bargains! I literally geek out over school supplies, so please excuse me! Not to mention, I’m a list maker and I go through tons and tons of paper so when I can get a notebook for $.17, you KNOW I’m going to jump all over it.

Target – Weekly Ad

Target

This week at Target, if you spend $30 or more on school supplies, you’ll get a $5 Target gift card. And if you spend $50 or more on school supplies, you can get a pretty cool $10 Target gift card. Text SCHOOL5 for the $5 gift card coupon or SCHOOL10 for the $10 gift card coupon.

WALMART – Weekly Ad

Walmart 1

Walmart 2

I’m going to be honest with you, Walmart is my favorite place to buy the back-to-school basics because they probably have the best deals! I mean, you can get a binder, some binder dividers, a notebook, and a folder for UNDER $3! I use binders and notebooks and folders all the time and I’m almost 30!.. Well, I mean I’m almost 28, allow me to not get carried away!

STAPLES – Weekly Ad

Staples 1

Staples 3

Office Depot – Weekly Ad

Office Depot 1

Office Depot 2

Office Depot is doing something kinda cool. As long as you spend a minimum of $5, you can get packs of loose sleeved paper for $.01. You cannot beat that!

——————————————-

You can get TONS of school supplies when there are such great deals out there, but not all kids are quite as lucky. My friend Nick, founder of the non-profit Make Caring Cool, has started a back-to-school initiative where he’s trying to collect enough supplies for all the kids in two schools in the Norfolk, VA area! A lot of the children in these two schools come from low income homes and dont have the tools they need to succeed everyday at school. I’ve attached a direct link to the donation page below where any amount of money you can donate will go to good use and be very helpful to get these kids the supplies they need, but if you’d like to take a look around at Make Caring Cool’s page, you can click right here. You won’t be disappointed. There’s lots of amazing things going on over there!

charity-jpeg-768x439

Donate to Make Caring Cool’s Back-to-School initiative here!


IMG_1940

Cheapest Way to Update a Room

The first time I ever painted a room was when I surprised my mom with a home office a few years ago. You may remember that I blogged about it. If not, check it out here. I swore, after painting that entire room TWICE all by myself, that I’d never paint again. I HATE painting. I’ve already painted our guest room and I knew I’d only need one coat so it wasn’t THAT bad. But when I finally made the decision to paint our dining room, I knew it was going to be a problem.

IMG_1760

Here’s a picture of our dining room right after we moved in. The color was nice but it made the room feel so dark and small. Sam actually liked this color and it truly wasn’t a bad color but I wanted my dining room to be light and airy. So after sampling about 6 or 7 different colors, we finally picked one! We landed on French Beige by Behr.

IMG_1803

I painted the whole damn room by myself. And you know that rickety, old ladder I was talking about in my last post about our office bookshelves? The one I refused to get on? Well guess whose big ass was up on it risking her life to paint around the ceiling. ME! But it came out so nice! We had to spring for the more expensive Behr Premium Ultra Supercalifragilisticexpialidocious Extreme paint but it was worth it because I painted the whole dining room with ONE coat and ONE can of paint! Would definitely recommend the Behr Premium Plus Ultra for any tough paint jobs.

The next thing we needed to do was get rid of our small counter height table for two and get a dining room table that would sit more than just Sam and I. I went on Target.com to order a mirror and ended up buying a dining table and chairs. Isn’t that always the way?! But this table and chairs is amazing and I’m so pleased with our purchase.

IMG_1845

IMG_1852

Moral of the story is that you can really make a room feel so much bigger, nicer, rejuvenated, etc. with a can of paint and it won’t cost you an arm and a leg! Unless you’re using an old, unstable ladder. Then it might cost you your life! -haha!

IMG_1910

Don’t forget to follow me on Instagram! 

@katiewelshphoto1

Office: Project Bookshelves!

I have to start by saying, my favorite room in our old apartment was the office! I was able to get things done and it was just a cozy and pleasant place to be. At the end of the day, I could go in there with a glass of wine and to relieve some stress I’d check some emails, browse Pinterest, or catch up on an episode of Kardashians that I may have missed. Don’t judge me! -haha!

When we moved into our new house we knew that the small room in the front of the house was going to be the office. We got a couple desks and set up our computers and monitors and video game consoles and calendars. It was a nice amount of space for an office but it was soooo boring and empty. I knew that I needed some bookshelves because for some reason I feel so much better when I’ve got my books around me (nerdy, I know). But here’s a picture of the office before our bookshelves.

IMG_1691

You see what I mean? It’s almost embarrassing to show. So it was no wonder why I didn’t want to spend much time in there.

Long story short, I wanted to put up some kind of industrial, rustic style bookshelves. At first I was going to put up shelves like this:

911f609a4820bc5a495bcbd1aedc619a

Which look gorgeous but after I found out the price of the galvanized piping, I had to check myself. Not only the price but all the time it would take to screw in all those flanges. So once I found these shelves, I literally jumped for joy!

shelves1

I was casually surfing Pinterest, with or without a glass of wine, I forget, but that’s besides the purpose. I came across this blog post over at 7th House on the Left and shed a tear because THIS is exactly what I was looking for without even knowing what I was looking for!

Basically followed the exact same instructions but got longer planks of wood and some different stain.

DSC_8151 (1)

DSC_8158

DSC_8160

DSC_8169

I especially loved that she spray painted the pipes in a matte black. I think it really makes everything look so much better! And by the way, you should have seen me sanding these boards outside in like 98 degree heat, COVERED in that sandy wood crap. Ugh!

So after I was done staining and spray painting, I basically just turned it over to Sam to finish the project. We have a really old, really flimsy latter in the basement that I refuse to climb, so it just goes to show how wonderful my husband is that he’s willing to risk his life to put up some shelves for little, old me!

IMG_1693

He’ll kill me once he sees that I posted a picture of him on here, but he’s such a cutie!

Anyways, the outcome of the whole project was insane! Way better than I thought it was going to be.

IMG_1885

DSC_8325

DSC_8326

Overall, I spent about $250-$270 for all of the materials, which isn’t bad at all. I also have some left over wood boards and stain so I’m thinking about adding some of those to our dining room!

IMG_1890

New Home, New Home Improvement Projects!

FullSizeRender

My husband Sam and I just purchased our very first home in Easton, PA! It’s an adorable 100+ year old, 3 bedroom house with an office and a really cute view of the city of Easton. We’ve been here for about two months now and we’re finally starting to make it our own. I think we’re moving a little fast on some of the projects, or at least my bank account is telling me to slow down, but we’re moving ahead full force! It’s so much fun to take a room, or a house for that matter, that feels like someone else’s and make it into a place that feels 100% and completely your own. It’s empowering and scary and expensive, all mixed together!

There wasn’t too much that NEEDED to be done in the house so our projects have been fairly small. But if you consider how un-handy both my husband and I actually are, it might as well have been extremely gigantic tasks. I thought since I haven’t blogged in FOREVER, that I’d start sharing some of the projects and where we got the inspiration and the costs and what not.

The best part about owning a home is just that. OWNING your own home. Also, my puggle Melo really enjoys the backyard. When we were living in our one bedroom apartment, Melo would take his bones and try to burying them in the corners of the couch cushions and we used to be so sad. Thinking that he probably wishes he had a backyard to bury his bones in. Luckily, he’s out in the backyard everyday digging up and burying his bones and it makes us so happy! He also enjoys some #frontporchchilling with us too 🙂

Processed with VSCO with t1 preset

Follow me on instagram for a sneak peak of some of the projects!

7 Things to Do When You’re Snowed In!

I was bamboozled by all of this hype of this historical blizzard we were supposed to get. I was actually a little nervous about the 18-24 inches that they were calling for, but here in Brick, NJ we probably got like 8 inches or so. But being snowed in can be so fun!

Here’s a glimpse into a few things that Sam and I did during our snow day!

1. Have some delicious coffee/tea/hot chocolate

2015-01-27_0001

Sam is a coffee drinker and I’ve never really liked the stuff. I’m definitely a tea kinda gal, but usually I don’t drink any caffeine in the morning which would explain why I’m so tired and/or lazy ALL THE TIME! Have some nice conversations and relax because you’re not going anywhere!

2. Work on a project that you’ve been neglecting! 

2015-01-27_0002

I’ve been working on this gigantic, ugly crochet blanket for like 4 months now and I think I’m on my last roll of yarn that I’ll need to complete it and I’m super excited. It’s just been taking up space on my couch and I really need to just get done with it already!

3. Read a book/Catch up on your magazine subscriptions/Journal your snowed in experience!

2015-01-27_0003

I’m in the process of rereading A Tree Grows in Brooklyn for the 30th time probably and also I just started reading The Life-Changing Magic of Tidying Up which is sincerely blowing my mind and I plan on writing a review on it as soon as I’m done! Also, I journaled about my all-time favorite snow day today. It included me and Sam sneaking out of a bedroom window to play in the snow!

4. Make a snow day playlist!

DSC_0111

Or listen to one that Spotify has already created for you here! I decided to dig out my old, dinosaur of an iPod. I put it on shuffle and let it do it’s thang!

5. Have a drink… or two!

DSC_0143

Crack open a couple beers or uncork that bottle of wine and chill out! Today is your day to unwind a little bit and chill out, so do it!

6. FaceTime with friends that are also snowed in.

DSC_0138

We FaceTimed with family in Boston who are also snowed in. They were making some delicious looking food while we chatted and I felt like I was in an episode of Barefoot Contessa! (As a sidetone, if you want to mix a little bit of #5 and #6 on this list, go ahead!)

7. And when all else fails – GO PLAY IN THE SNOW!

I don’t have any pictures for this one but last night I put on a couple layers, wrapped my Uggs with grocery bags and spent a few minutes on my balcony and that was enough for me. It was actually beautiful and it made me feel so alive! Standing out in the quiet, thick winter air makes you realize how grateful you are for a lot of different things (the winter air also smells cleaner and fresher, am I right?).

I was snapping pics all day today and last night too! By the end of today I noticed that Sam was walking around the apartment making fun of me!

DSC_0020

I don’t blame him. I’m sure it was super annoying telling him to freeze so I can try and capture the moment – LOL!

Anyways, I hope that everyone had a great day and that you’re all safe!

Happy At-Least-It’s-Not-Monday Day!

DSC_0050

Blue Apron Review + Special Discount!

blueapron1

It’s no secret that I’m a below average cook. I’m not sure why either! I come from a family of amazing women that can cook their asses off. I even married into a family of women that can cook really well so I’m not sure where I went wrong. You’re probably thinking, “why do you care if you can cook or not? You have awesome cooks in your family, just let them do all the cooking.” Well, the truth is that I do care and I don’t know why. I’m a pretty creative person outside of the kitchen and I just figured that if I learned a thing or two or tried new things maybe something will click and I’ll turn into this Julia Child’esque chef and never depend on anyone else to make me a delicious meal!

So, with all of that being said, I signed up for Blue Ribbon Apron. I’m not sure why I want to keep calling it Blue Ribbon, but I do. Anyways, it’s called Blue Apron and if you don’t know what it is you can check out their website here. But to make a long story short, they ship you everything you need to make a great meal. They have two different plans. One plan is for two people meals and the other is for four people meals. The cool thing about it also, is that you can skip weeks if you’d like. I don’t want them mailing me stuff every single week so I skip every other week. We get three meals a week, twice a month. Sam and I eat really boring things. I only know how to make a handful of things so as long as Blue Apron doesn’t send us sloppy joes, Old El Paso tacos, chicken pot pie, or DiGiornos pizza, then I’m fairly confident that we’ll be making things that we’ve never tried before. I always see recipes online that I’d like to try but then get discouraged when I see things like sage, turnips, gochujang, gai lan, etc. I don’t even know what those ingredients look like, let alone where the hell I’d find them if I wanted to attempt to make these crazy dinners. So Blue Apron sends you all of that stuff and I don’t have to go to the grocery store and make an ass out of myself looking for them!

My first Blue Apron delivery came this week and this is what I got:

Korean-Style Tteok – w/ spicy pork “ragu” & gai lan

DSC_0013

Chicken Charlemagne – w/ roasted root vegetables & parsnip-potato mash

DSC_0021

Banana Leaf-Steamed Cod – w/ spiced rice, yu choy & coconut

DSC_0027

They suggest that if you receive any kind of fish in your package that you make that first, as it’s the first that will go bad if you keep it for awhile, so we made it on Tuesday. It was actually really good, really easy to make, and definitely something I would have never made if it weren’t for Blue Apron being so convenient. I’m not even much of a fish person and I liked it a lot. Last night I made the chicken charlemagne and I was quite impressed with myself because I’m usually awful at making chicken but it came out really tasty! And the potatoes AND parsnip mashed potatoes? Like, WHAT? Does everyone know about this? PARSNIP in the MASHED POTATOES? Because it was amazing and quite frankly blew my mind.

 So, let’s break it all down. Sam and I have a grocery/food budget of about $300-$350 a month. That includes all of our take-out money and going out to eat money. We only go out to eat or order take out when we want something that neither of us can cook so Blue Apron sends us stuff that we don’t know how to make and teaches us how to make it for only $120/month. Which I think is a fantastic deal and based on the dishes that I’ve made, I’d definitely say it’s worth it so if you were on the fence about giving Blue Apron a shot, my recommendation would be to GO FOR IT!

My first 50 readers get two free meals with their first Blue Apron Box – redeem here.

Happy Thursday/Almost Friday Day!

Travel Fund

If you follow me on Instagram, you probably noticed that Sam and I went to Boston for the weekend to visit some family. We had so much fun, even though it felt like it was below zero outside! But we survived and ended up eating and drinking our way through Boston.

Yes, that is our mess. We are pigs!

Yes, that is our mess. We are pigs!

I haven’t shared it on my blog yet, but my father passed away in early November of last year. He was pretty young and I think about him constantly! Anytime Sam and I are planning on going somewhere or doing something I think to myself, “Hmm, I wonder if my dad ever had the chance to do this, or go to this place.” Not sure if that is normal or not but whatever. I made my new years resolution to experience more things and go to more places.

On our 4 hour drive up to Boston, Sam and I decided that every year we want to travel to at least 2-3 places we’ve never been before. Doesn’t have to be to some extravagant place and doesn’t even have to be super far from where we live. Maybe just for a weekend trip or a few days longer, but just somewhere that neither of us have been before. I’m pretty excited to start coming up with ideas of places to go, but thinking about how much money it’s going to take makes me a little nervous. We save a lot of money each month and some of the money we save goes into our “travel fund” so that should help cover our trips throughout the year but I’ve also started doing the 52 week money challenge in order to save money that we can use as spending cash while we’re on one of our adventures. I don’t think people understand how easy it is to save with that damn challenge. I love it!

02f991a20ea134befbdeb0230f9f3402

Where have you traveled to? Your favorite vacation destination? Favorite weekend getaway location? Give me ideas!

Happy hump day!

Three of My Most Popular Budgeting & Savings Posts!

On Thursday I finally reached 100,000 views on my blog! I was kinda freaking out a little bit! Feels pretty crazy knowing that over 100,000 people have come to my blog at some point for some reason. So thank you to everyone for checking it out!

Anyways, in the past three weeks my views have spiked because at the beginning of every year everyone wants to get their budget in order, along with other things like lose weight, adopt a healthier lifestyle, out with the old and in with the new, and all that good stuff. A few of my budgeting and savings posts from 2013 and 2014 were getting a lot of attention because they’re super easy to use so I thought I’d link you to them in one post so that you can easily find them.

1. Monthly Budget Spreadsheet! – Before you can determine how much money you can and should be saving a month you need to figure out your monthly budget! I promise it’s not as painful as it sounds and doesn’t take too long to put it all together. But honestly, it’s a necessity!

aa3f6b9345f073749c066b04b50c79df

2. Yearly Budget Spreadsheet! – Once you get your monthly budget together the yearly budget spreadsheet is just a place to keep you on track all throughout the year. It’s also fun to see how much money you’ve saved at the end of the year!

yearlybudgetsample

3. The Revised 52 Week Money Challenge! – It’s not your average 52 week money challenge. Believe it or not it’s actually a little more challenging. See which of the three challenges tickles your fancy!

26-week-double

All of the links to download the spreadsheets and the 52 week challenges are in each of the posts. I hope they help you and happy saving!

IMG_0898